How to aim headlights? 5 steps you need to know
Properly aiming headlights are crucial for safe driving, especially when navigating dark or poorly lit roads. Misaligned headlights can not only reduce your visibility but also create dangerous glare for oncoming drivers. In this blog, we’ll walk you through a detailed step-by-step guide on how to measure and aim headlights for accurate alignment. With just a few simple tools and some basic adjustments, you can ensure that your headlights are working optimally and enhancing your driving safety.
When do you need to adjust the LED headlights?
After Replacing Headlights: If you’ve Upgraded To LED Headlight Bulbs or replaced the headlight assembly, the alignment may be off.
After a Vehicle Load Change: Adding or removing significant weight from your vehicle (like heavy cargo or passengers) can alter the angle of the headlights.
After Suspension Repairs or Modifications: If you’ve had work done on your suspension or made modifications, it could affect the headlight alignment.
If You Notice Poor Illumination: If you find that your headlights are not providing adequate road illumination or are causing excessive glare for other drivers, it may be time to adjust them.
After a Collision or Impact: If your vehicle has been involved in an accident, even a minor one, the headlight alignment could be affected. It’s a good idea to check and adjust if necessary.
How to aim LED headlights?
1. Materials Needed to Adjust the LED Headlight
(1) Measuring Tape: For accurately measuring the height of the headlights from the ground and marking positions on the wall or garage door.
(2) Level Surface: A flat, level area to park your vehicle and ensure accurate adjustment.
(3) Marking Tape or Painter’s Tape: To mark the height of your headlights and create a reference point on the wall or garage door.
(4) Screwdriver or socket wrench
(5) A Wall or Garage Door: To project the light from your headlights onto, allowing you to see and adjust the alignment.
(6) Flashlight or Assistant: While not always necessary, having extra light can help you see the adjustment points better. An assistant can also be helpful for operating the vehicle controls while you adjust the headlights.
2. Environmental Requirement
(1) Level Ground: Ensure the vehicle is parked on a flat, level surface. This is critical because an uneven surface can cause incorrect headlight alignment. A level surface ensures that adjustments are made based on the correct angle.
(2) Even Lighting Conditions: Conduct the adjustment in low-light or twilight conditions. This helps you see the headlight beams more clearly against the wall or garage door. Avoid performing the adjustment in full daylight, as bright conditions can make it harder to discern the beam patterns.
3. Need to attention
(1) Check Tire Pressure: Verify that all tires are inflated to the recommended pressure. Proper tire pressure ensures that the vehicle is at its correct ride height.
(2) Remove Excess Weight: Remove any heavy items from the vehicle, especially from the trunk or rear seat, to avoid affecting the headlight angle.
(3) Ensure the Vehicle is Loaded as Usual: If you frequently drive with a specific load or number of passengers, simulate this condition by having an appropriate amount of weight in the vehicle.
4. Aim Headlight Adjustment steps
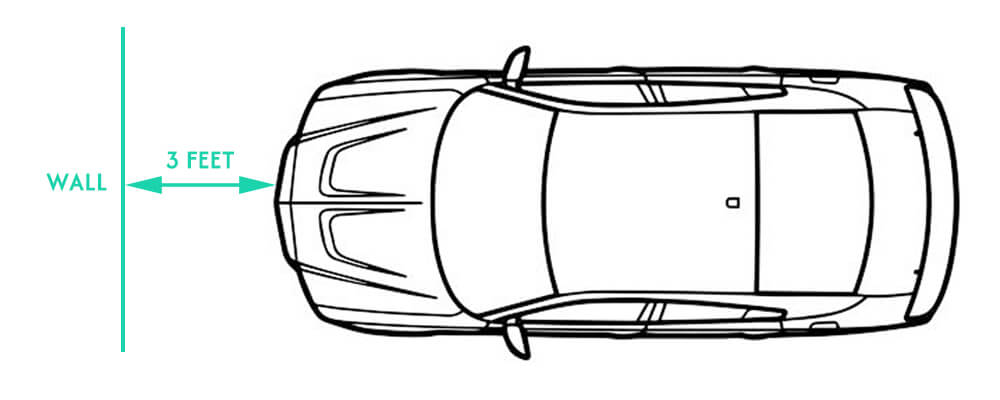
(1) Once you have your vehicle squared up to the wall, three feet away, identify the vehicle’s center and add a vertical piece of painter’s tape or something to indicate the center. Then, identify the center of each headlight and add another vertical piece of tape on either side.
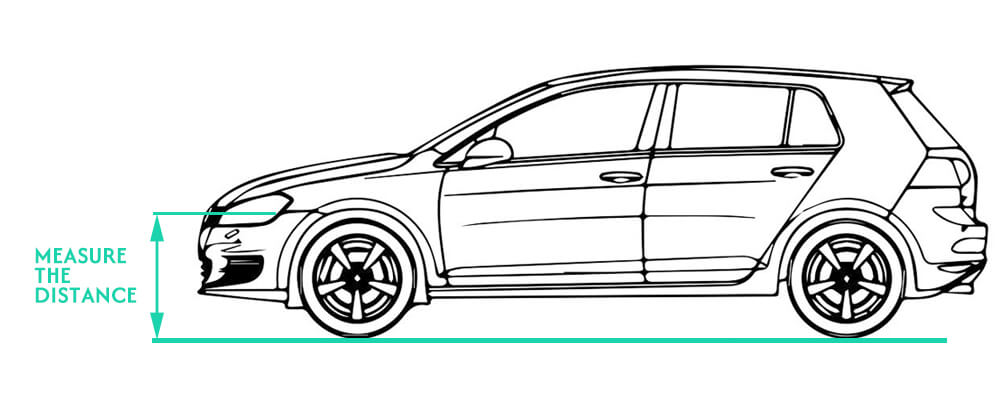
(2) Use masking tape to mark the center of each headlight on the wall or garage door. You can do this by measuring from the center of each headlight to the ground and marking the same height on the wall.
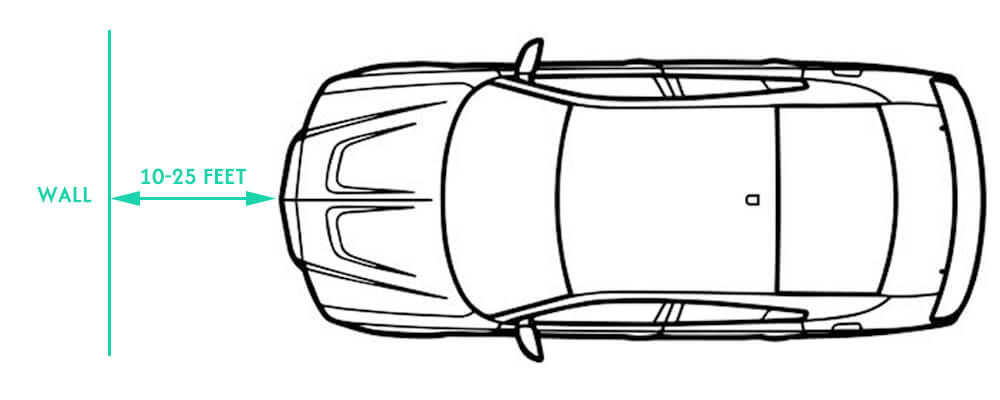
(3) Position your vehicle about 10 to 25 feet away from a flat wall or garage door. The exact distance isn’t critical but should be consistent for both headlights.
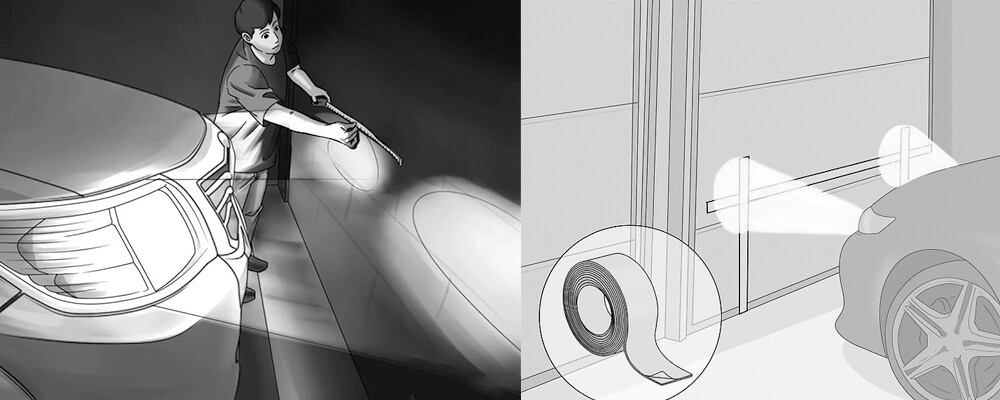
(4) Turn on your headlights and note where the beams hit the wall. You should see a distinct horizontal line of light with a cutoff on the right side to avoid blinding oncoming drivers.
(5) Most vehicles have vertical and horizontal adjustment screws located near the headlight assembly. To adjust, use a screwdriver to turn the screws:
– Vertical Adjustment: To raise or lower the beam.
– Horizontal Adjustment: To move the beam left or right.
– Adjust the headlights so the top of the beam’s most intense part is just below the height mark on the wall. The cutoff should be just to the right of the vertical mark to avoid glaring into the eyes of oncoming drivers.
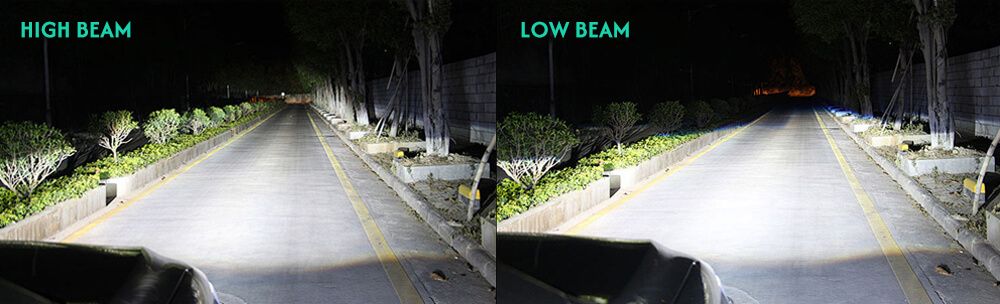
5. Test on the road
By these steps to measure and mark your headlights, you can achieve precise alignment and improve your nighttime driving experience. Properly aimed headlights help you see the road better and reduce the risk of blinding other drivers, making every journey safer. Regularly checking and adjusting your headlights is a small yet important part of vehicle maintenance. Keep your headlights aligned, and enjoy clearer, safer drives every time you hit the road. Safe driving!